
The Shift Planning feature allows administrators to create, manage, and assign shifts for care staff. Nurses and other caregivers can only view the schedules, ensuring clarity and organization in shift allocation.
Step 1: Click on Shift Planning from the dashboard to access the scheduling tool.
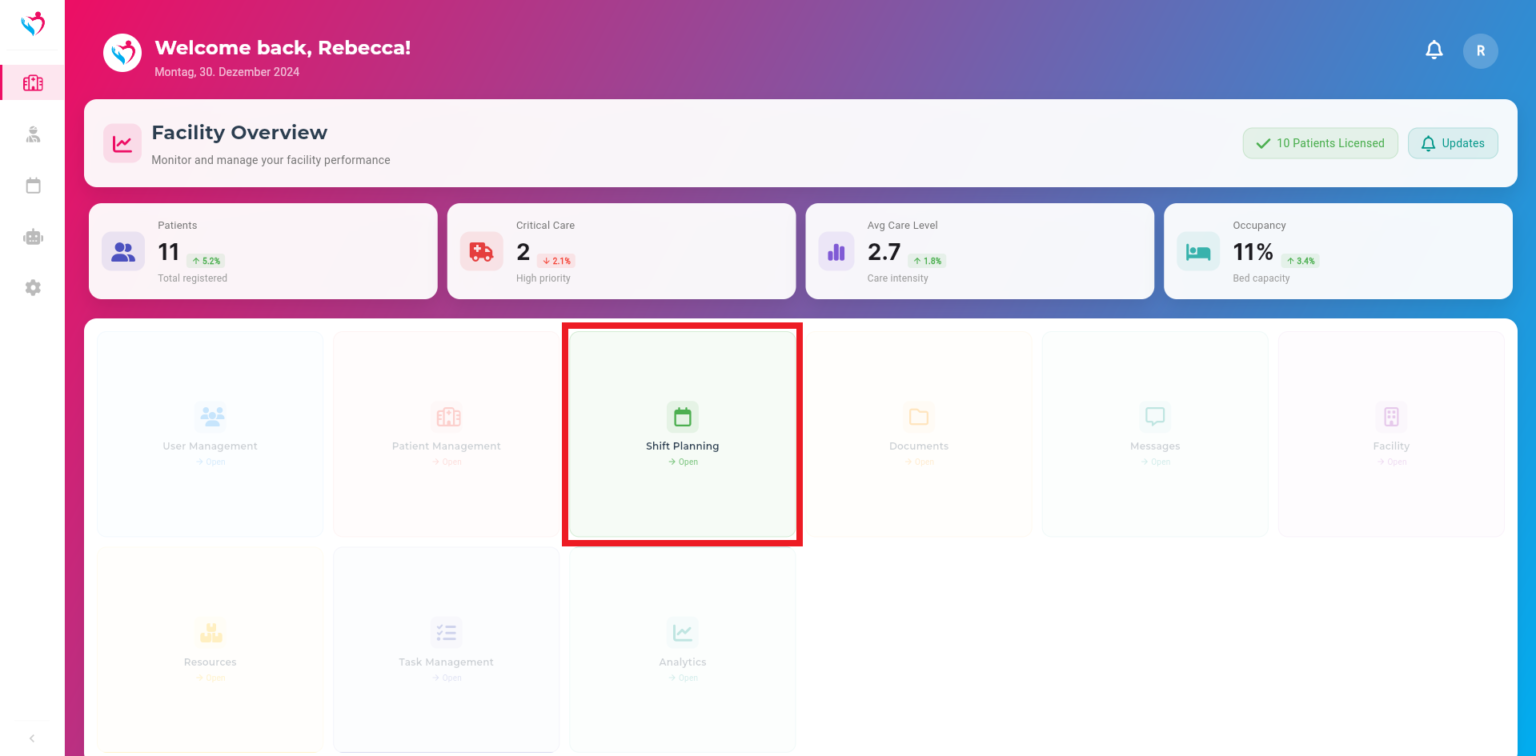
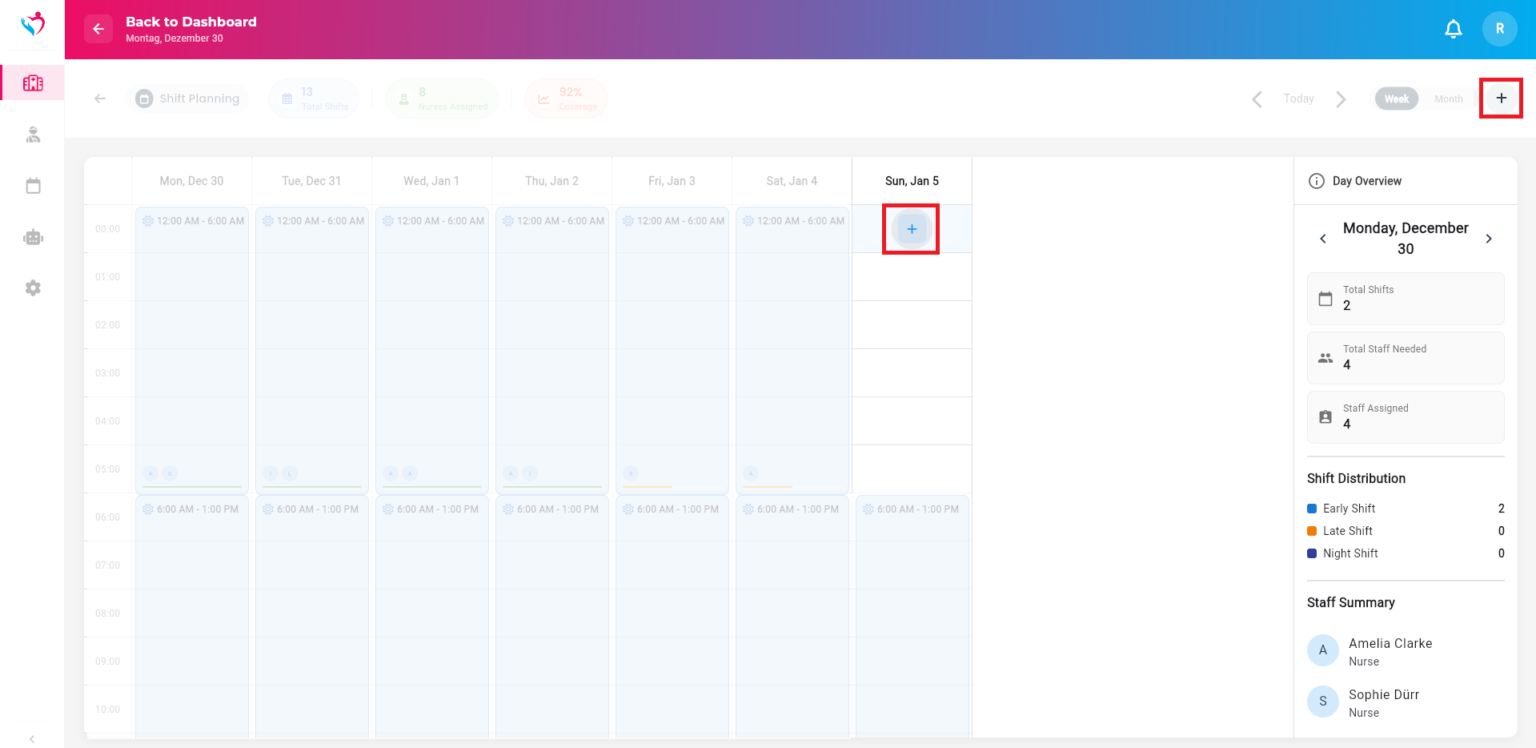
Use the weekly or monthly view to locate the desired date for the shift.
Step 2: Click on the specific time slot or use the “+” button to add a new shift.
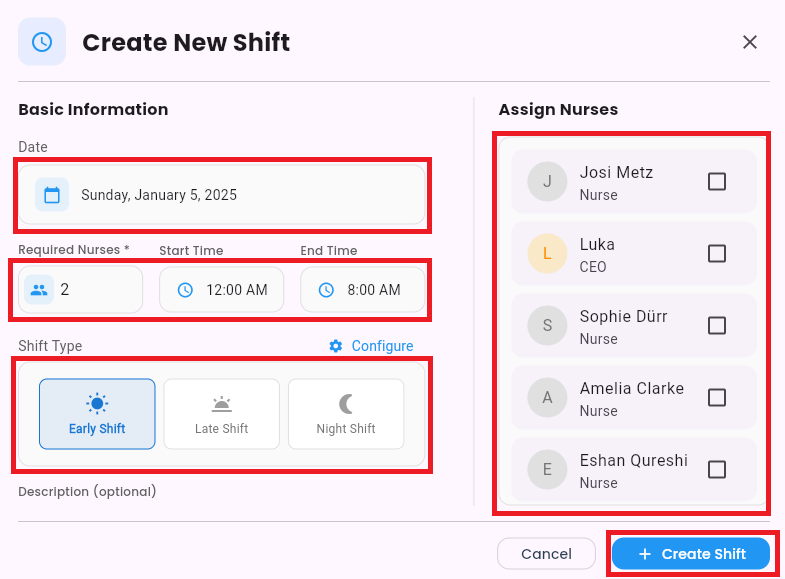
Step 3: On the new page, enter the shift details such as the date, shift type, and assigned nurses. Click Create Shift to complete the process.
The shift will then be displayed in the calendar. Additionally, caregivers can view their assigned shifts on the main dashboard.
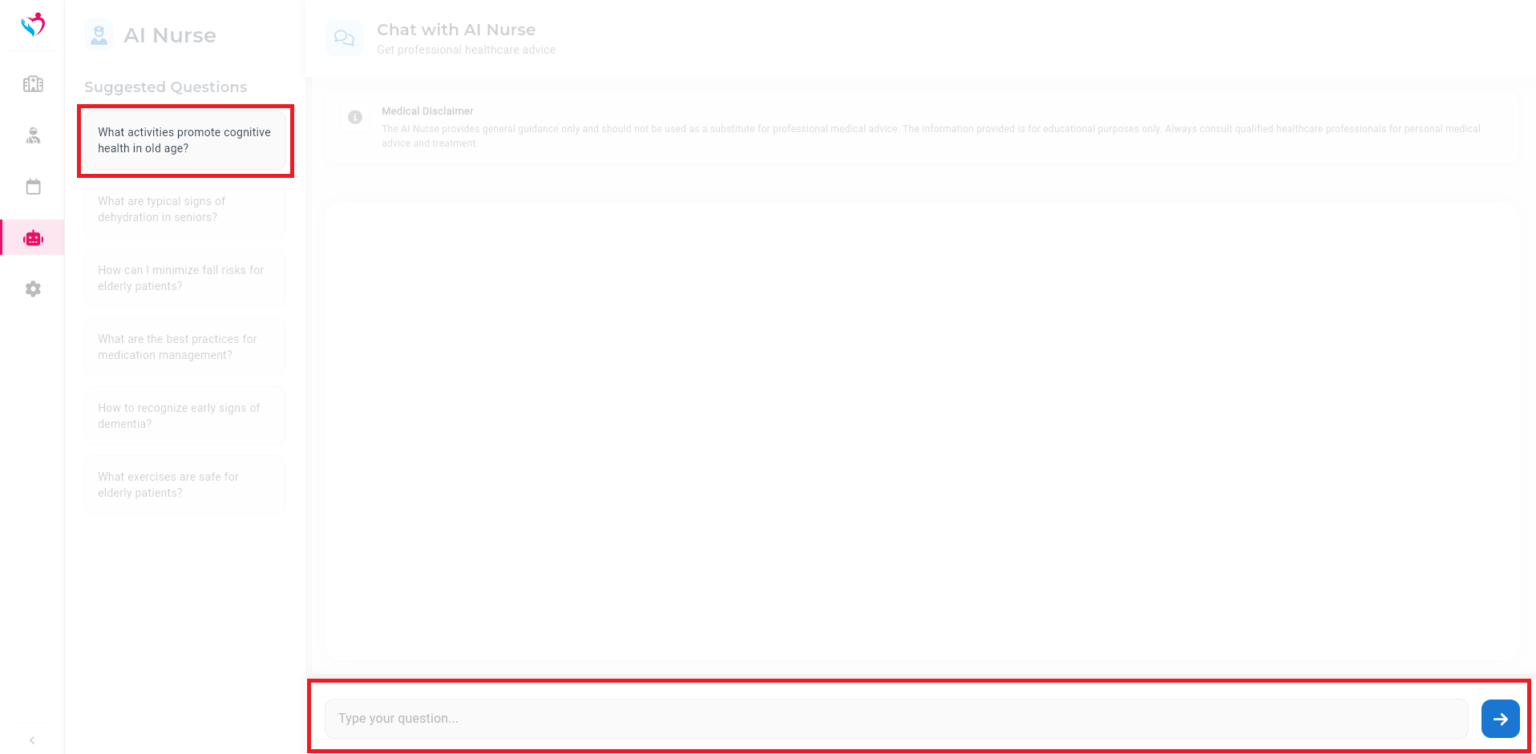
The AI Nurse module allows caregivers to get instant assistance and expert advice on elderly care. You can ask the AI questions related to health topics like dementia signs, fall prevention, safe exercises, or medication management.
Step 1: Navigate to the “AI Nurse” section in the main menu on the left panel.

Step 2: On the left panel, you’ll find a list of commonly asked caregiving questions. Simply click on any question to receive a detailed response, or type your own specific query to get tailored advice.
The User Management module allows you to add, edit, and manage caregivers and administrators while assigning specific roles to each user. This feature can only be used by administrators.
Step 1: The User Management feature is right on the homepage. Click on “User Management”
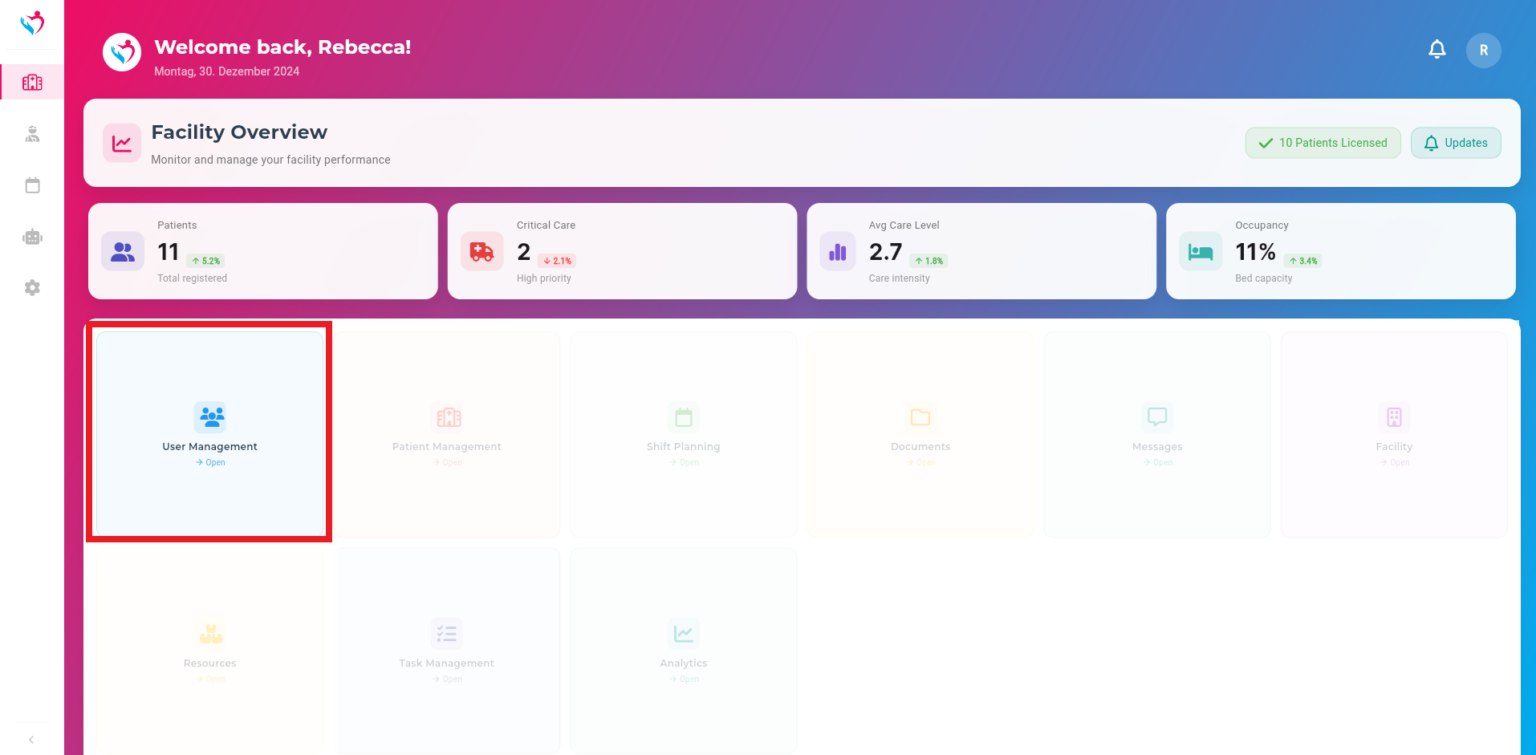
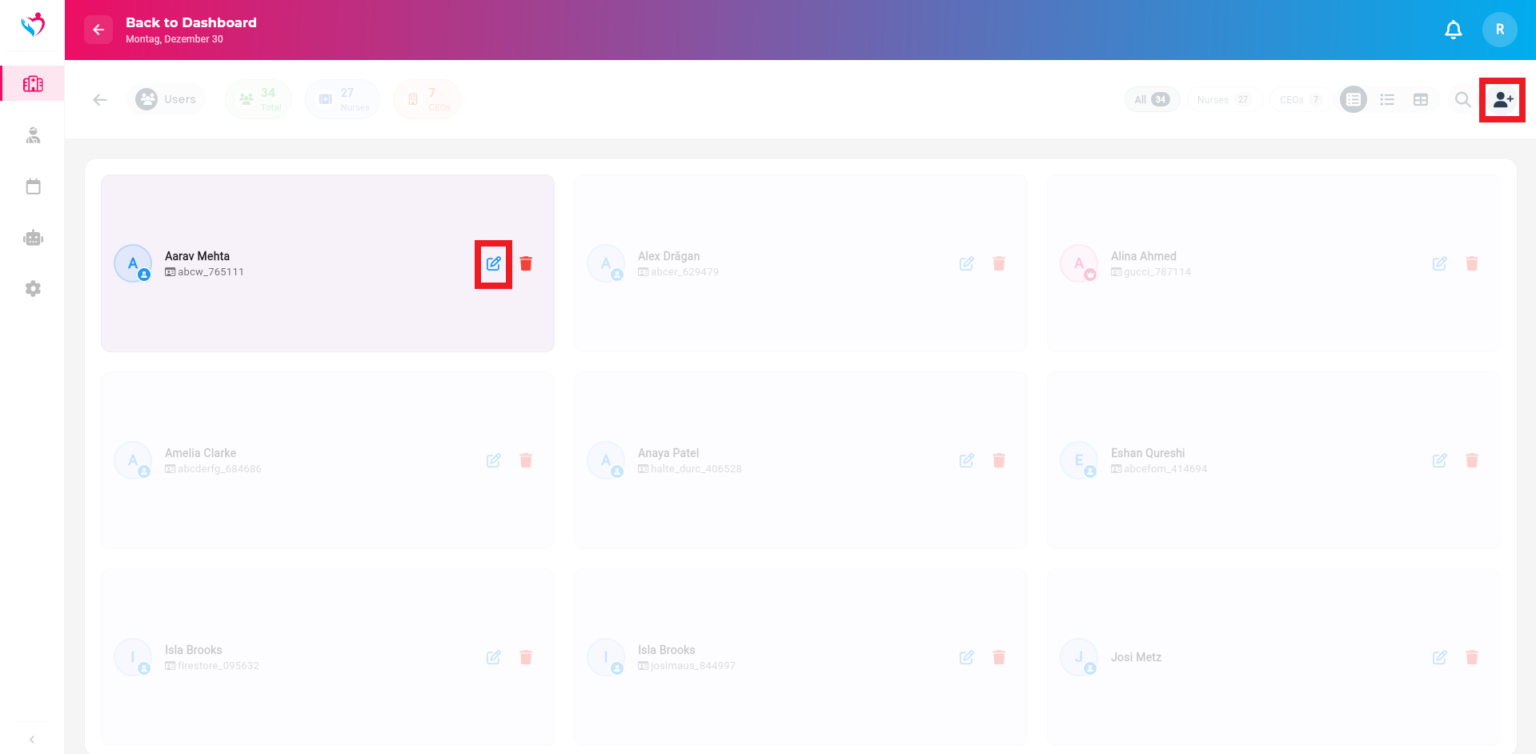
In the User Management menu, you will see an overview of all individuals in the facility. You can click on a person to edit their details. At the top right, you can switch between different views.
Step 2: If you want to add a new caregiver or administrator, click on the Add User icon in the top right corner. Or click on the pencil to update existing user details.
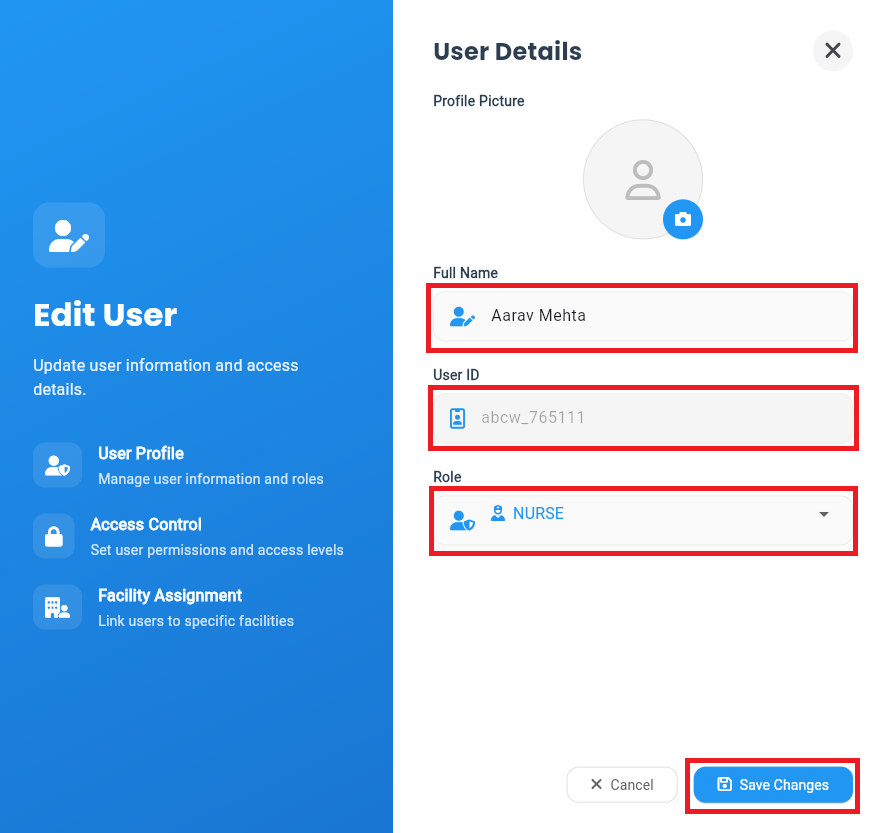
Step 3: When the form opens, you can create a new worker. Enter the name, email, and a password. The email and password will serve as the login credentials for the software for that worker. Additionally, you can select their role.
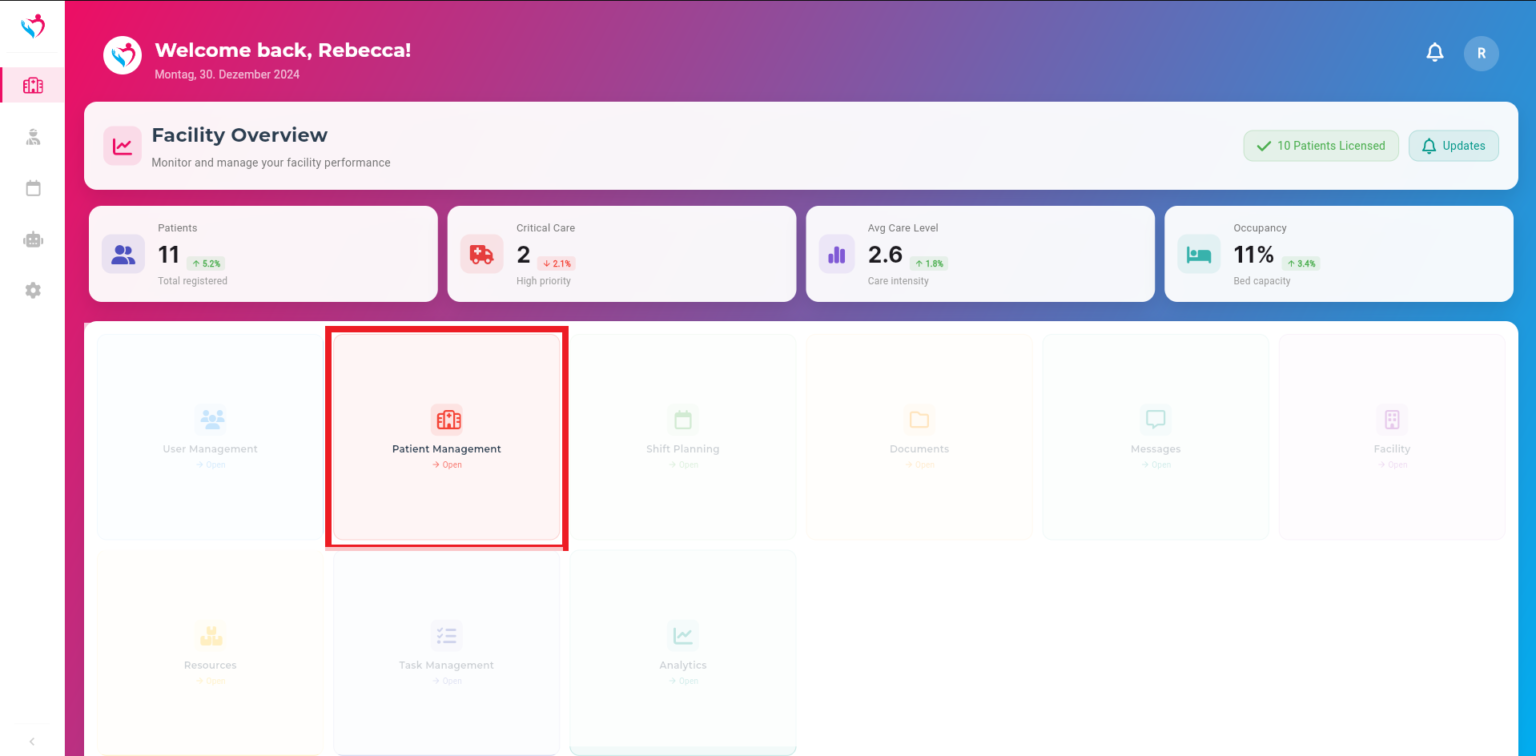
The Patient Management feature allows you to efficiently organize and manage all patient-related information within your care facility. You can add new patients, edit their details, and assign care levels. This feature can only be used by administrators.
Step 1: Navigate to the Patient Management section from the main dashboard by clicking on Patient Management.
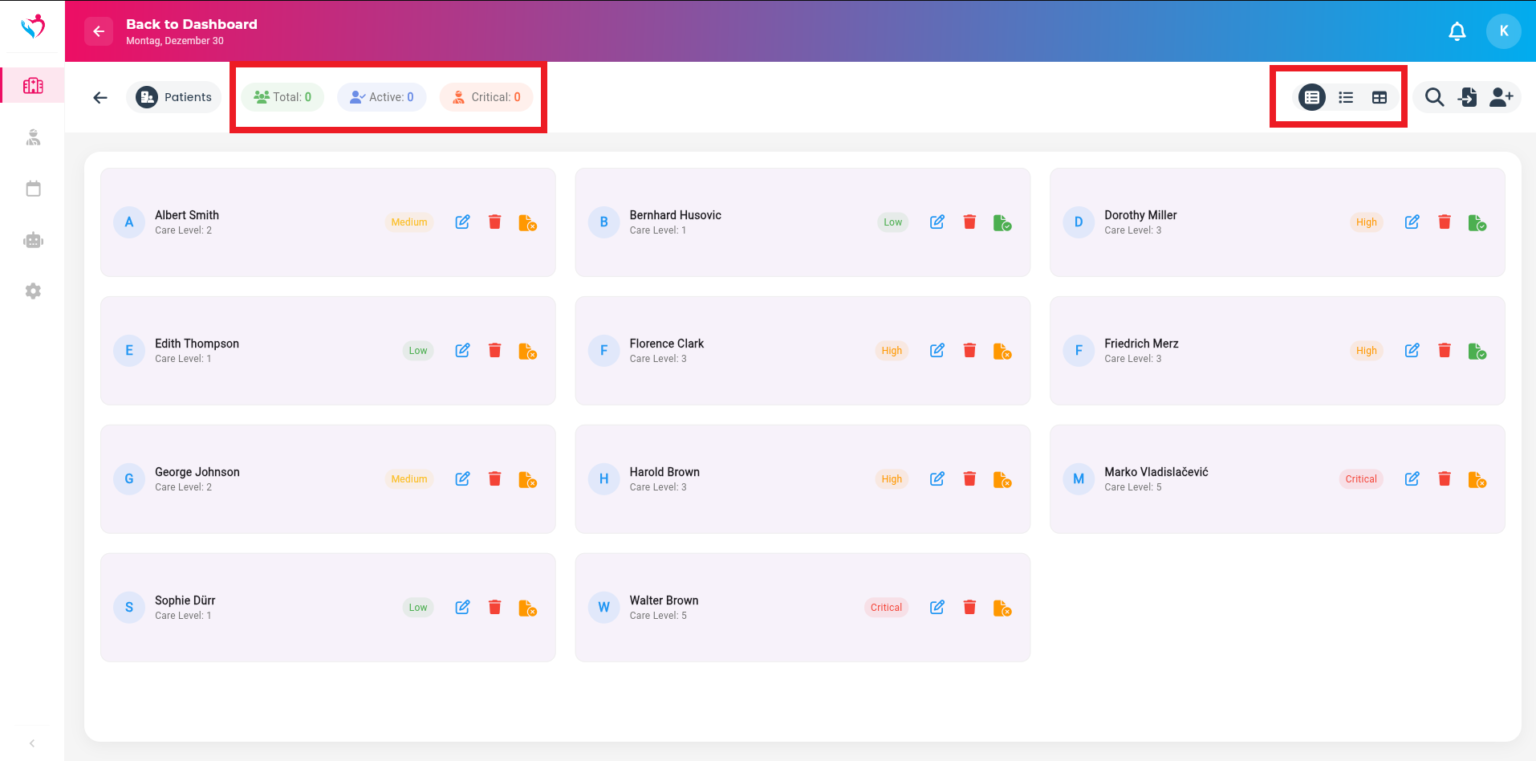
In the left panel, view the total number of patients, the number of patients requiring critical care, and your facility’s licensed capacity. The patient list displays names and care levels, categorized as Low, Medium, High, or Critical. Use the icons in the upper right corner to switch between different list views for better accessibility.
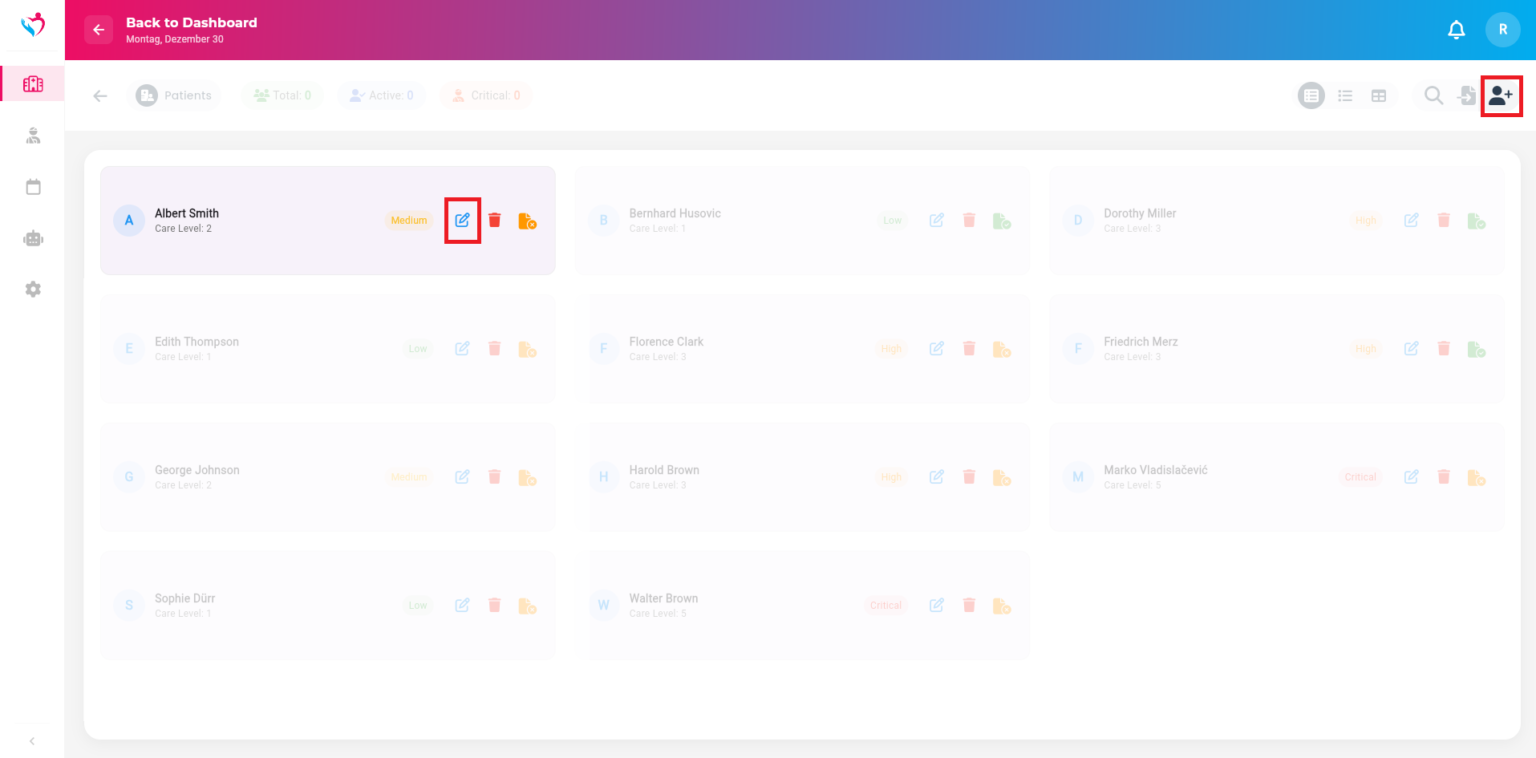
Step 2: Click on the “+” (Add Patient) button in the upper right corner to create a new patient profile. Or click on the pencil to update existing patient details.
Step 3: Enter the patient’s information. Provide the name, age, care level, and room number, then click on Create Patient.
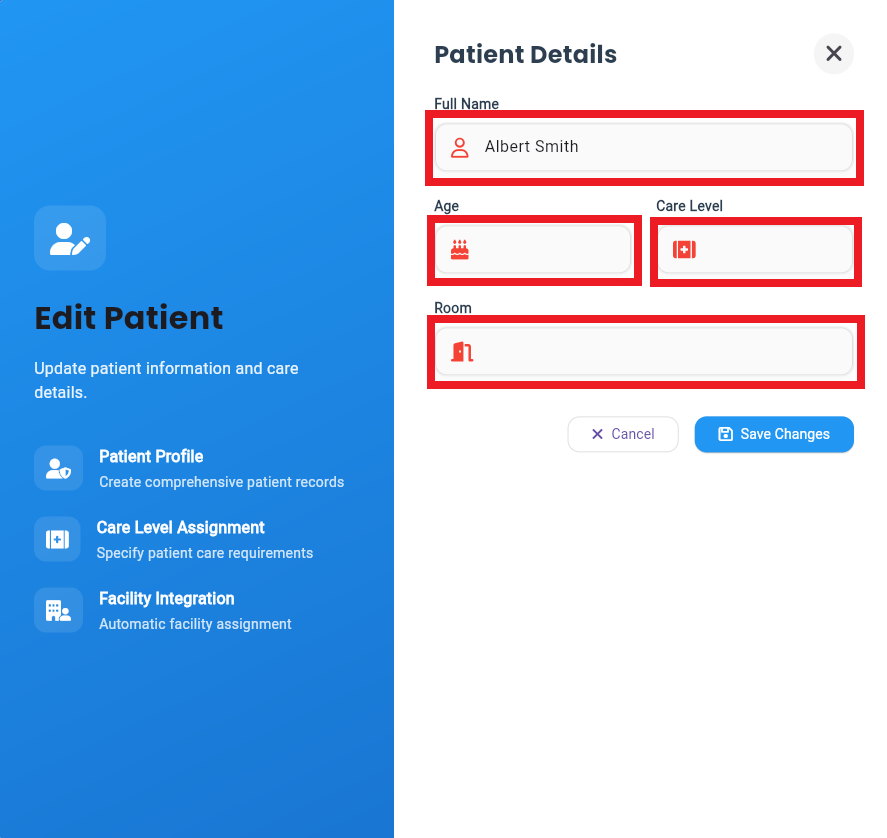
When patients created, click the pencil icon next to a patient’s name to edit their information. Update personal details, adjust care levels, or add relevant medical notes.
Subscribe to our newsletter today to receive latest news and get 10% off for your first month.