
The Documents feature in ElderCarePlus allows users to upload, share, and organize important files related to their care facility. This ensures that all relevant documents, such as reports, medical forms, or internal guidelines, are centralized and easily accessible to the entire team.
Step 1: From the dashboard, navigate to the “Documents” menu to view your document repository.
Step 2: Locate the “+” (Add) button in the top-right corner of the screen. Choose a file from your computer and upload it. Click “Upload” to save the document.
You can place the file in a folder for better organization or leave it in the main section.
On the Facility Overview page, all basic facility details (e.g., name, address, phone, email) are displayed. To edit any detail, click on the Edit Icon next to the respective section.
The License Information section shows the total number of licensed patients and the license expiration date. To add more licenses, click the “Buy Licenses” button and follow the instructions to complete the purchase.
In the Facility Statistics section, you can see the total number of staff members, the licensed patient capacity and current occupancy rate and an visual timeline of license validity and usage.
The Messages feature in ElderCarePlus enables seamless communication within the care facility. It includes direct messages for one-on-one conversations and team chats for group discussions, fostering collaboration and ensuring everyone stays informed.
Step 1: Click on “Messages” from the dashboard to open the communication module.
Step 2: Click on the “+” Icon in the left upper corner to start a new message or group chat. Choose a colleague from the list or enter their name in the search bar.
Type your message in the text box and press “Send.”
The Calendar module helps to manage and organize patient or staff schedules effectively. Use the calendar interface to create, view, or update appointments.
Step 1: Navigate to the My Patient section from the main menu and click on Calendar.
The right side displays all scheduled appointments for the selected date.
Step 2: To add, click the “New Appointment” button in the top-right corner.
Step 3: A form will appear. Fill in the required fields (Title, Date & Time, Location and Description). Click Save Appointment to finalize.
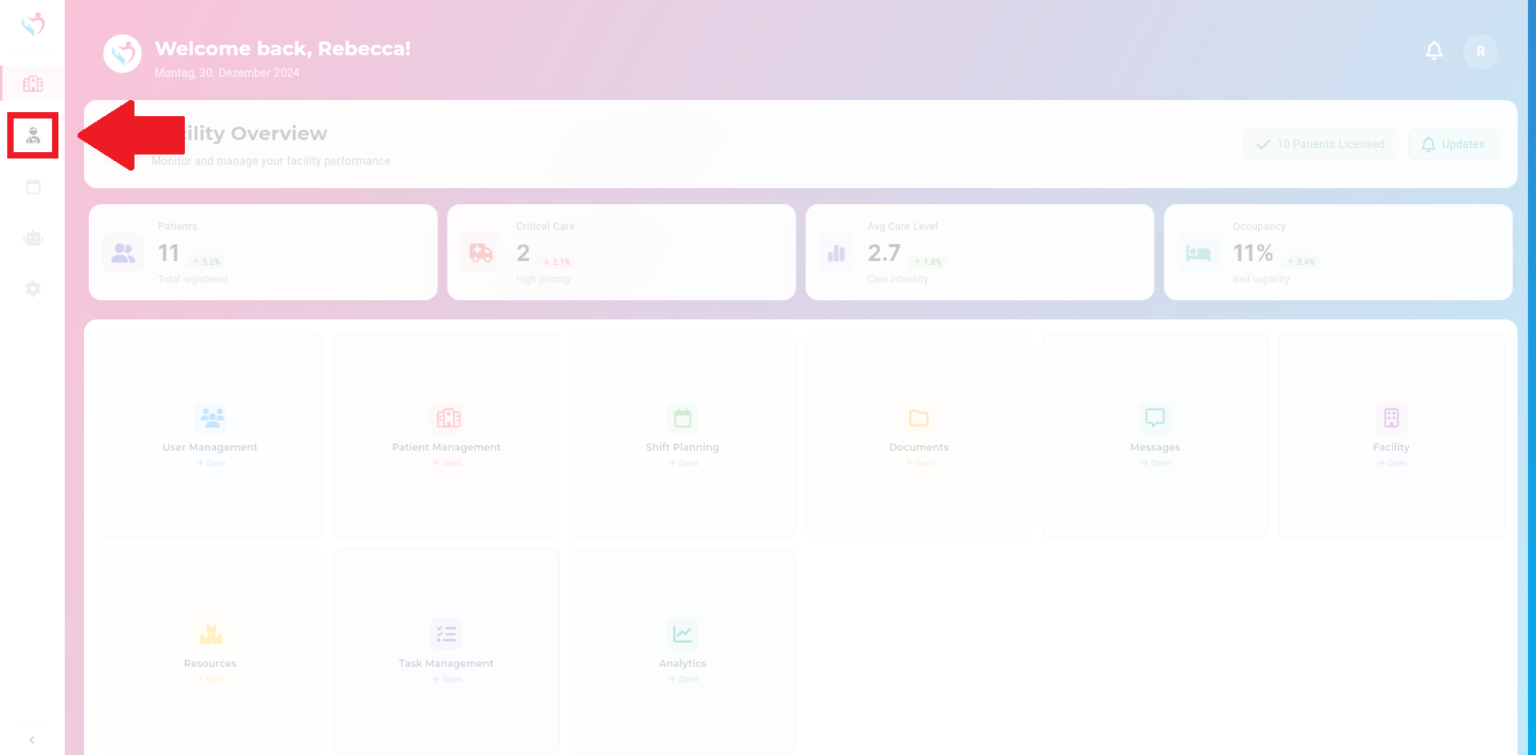
The Medication Info feature allows caregivers to review detailed information about medications. This module is designed purely for informational purposes and ensures that caregivers have quick access to essential data regarding medications.
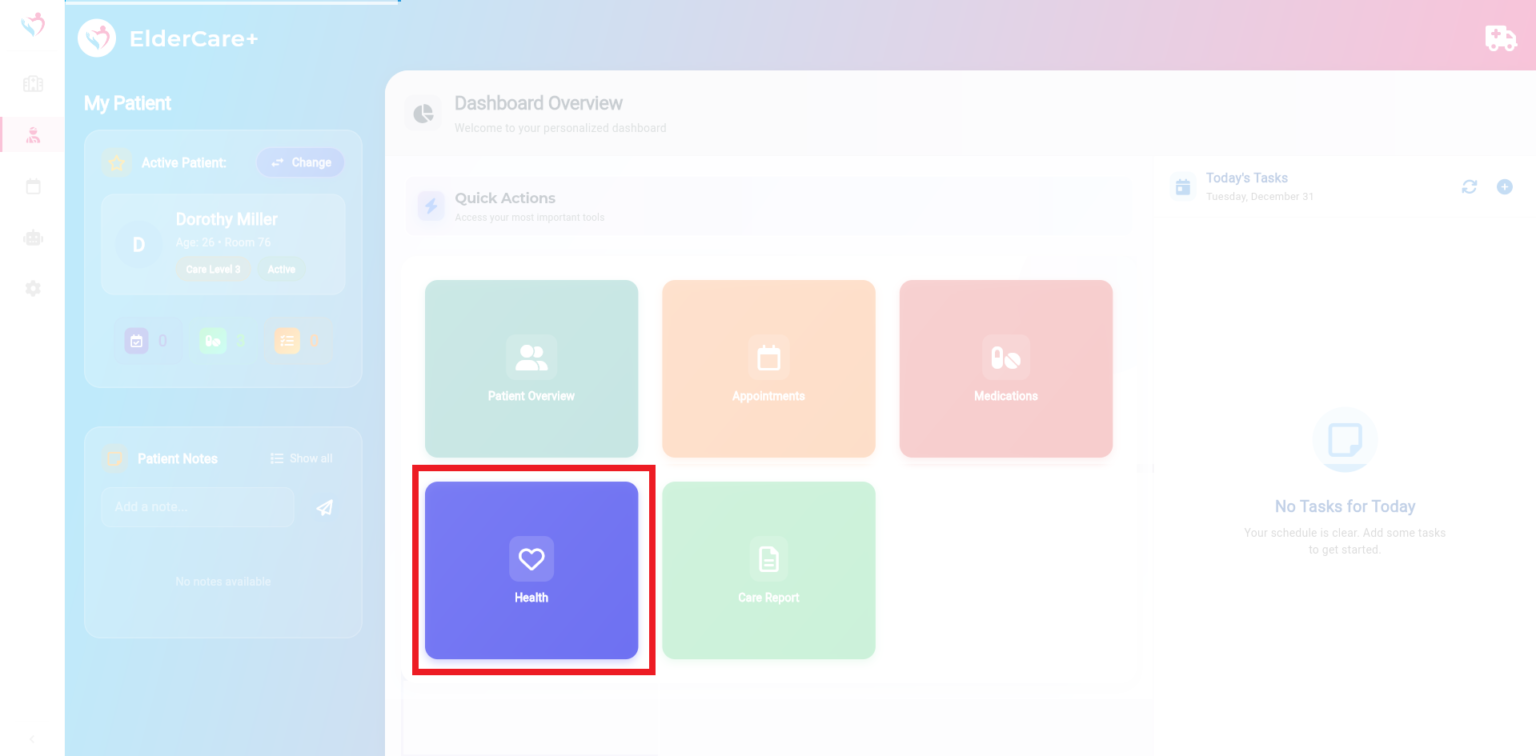
Step 1: Go to My Patient and click on “Health”. You will find the Medication Info there.
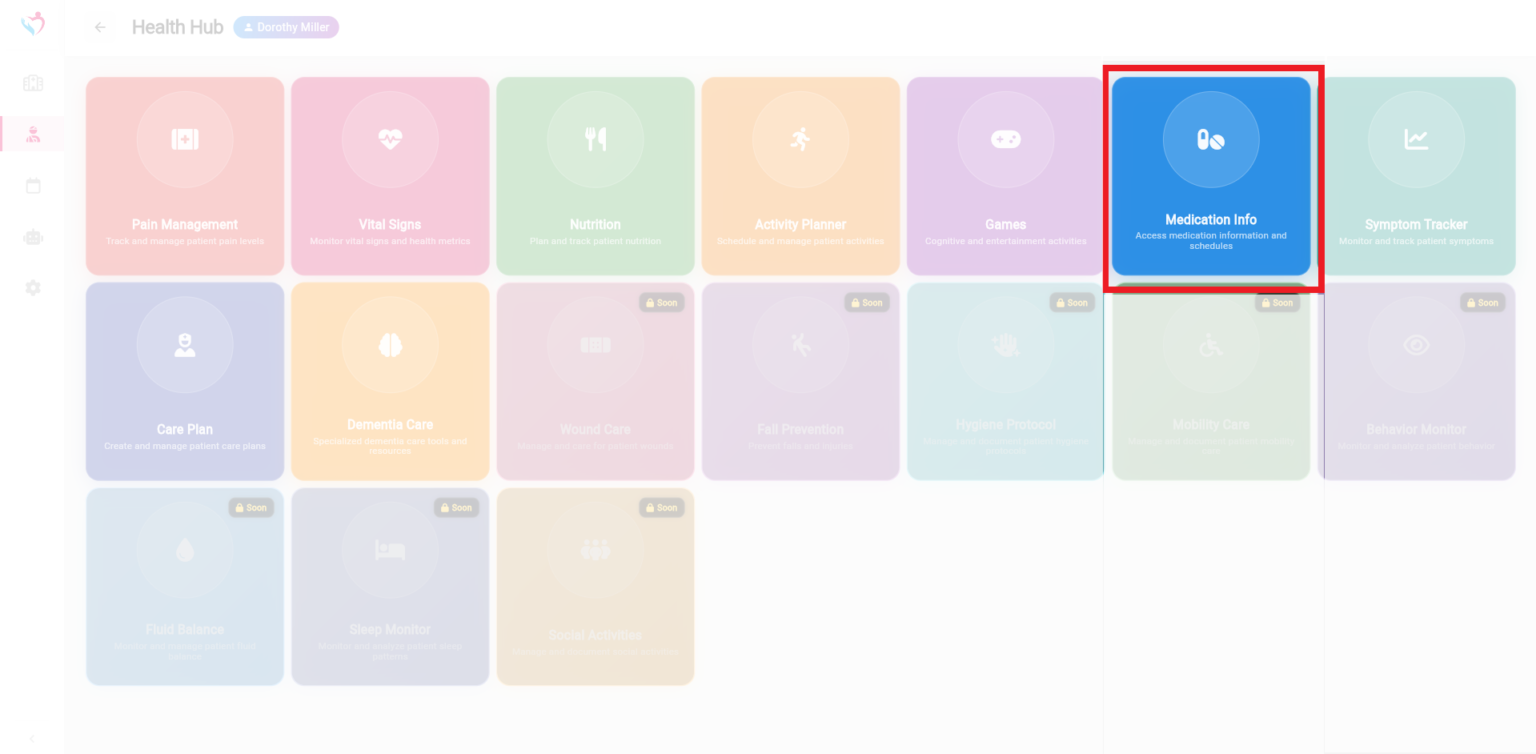
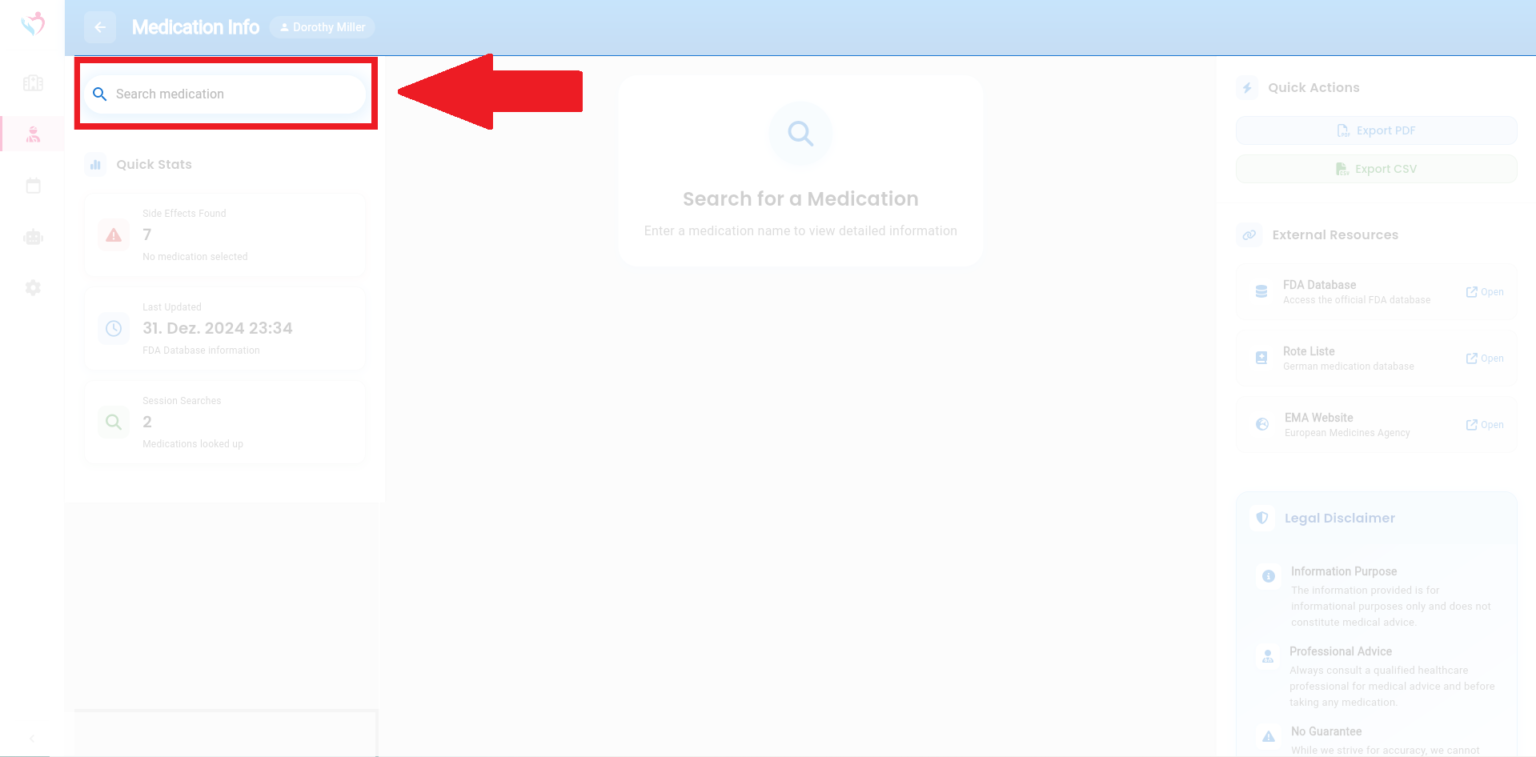
Step 2: Click on “Search Medication” in the upper left corner, enter the name of the medication, and press search. The relevant information about the medication will then be displayed.
The Task Management feature allows caregivers to organize and monitor their daily responsibilities effectively. Administrators can create, assign, and prioritize tasks for the team, while caregivers can track and update their progress.
Step 1: From the dashboard, click on Task Management to open the task overview.

Tasks are listed chronologically in a calendar or list format. Filter them by category, priority and status.
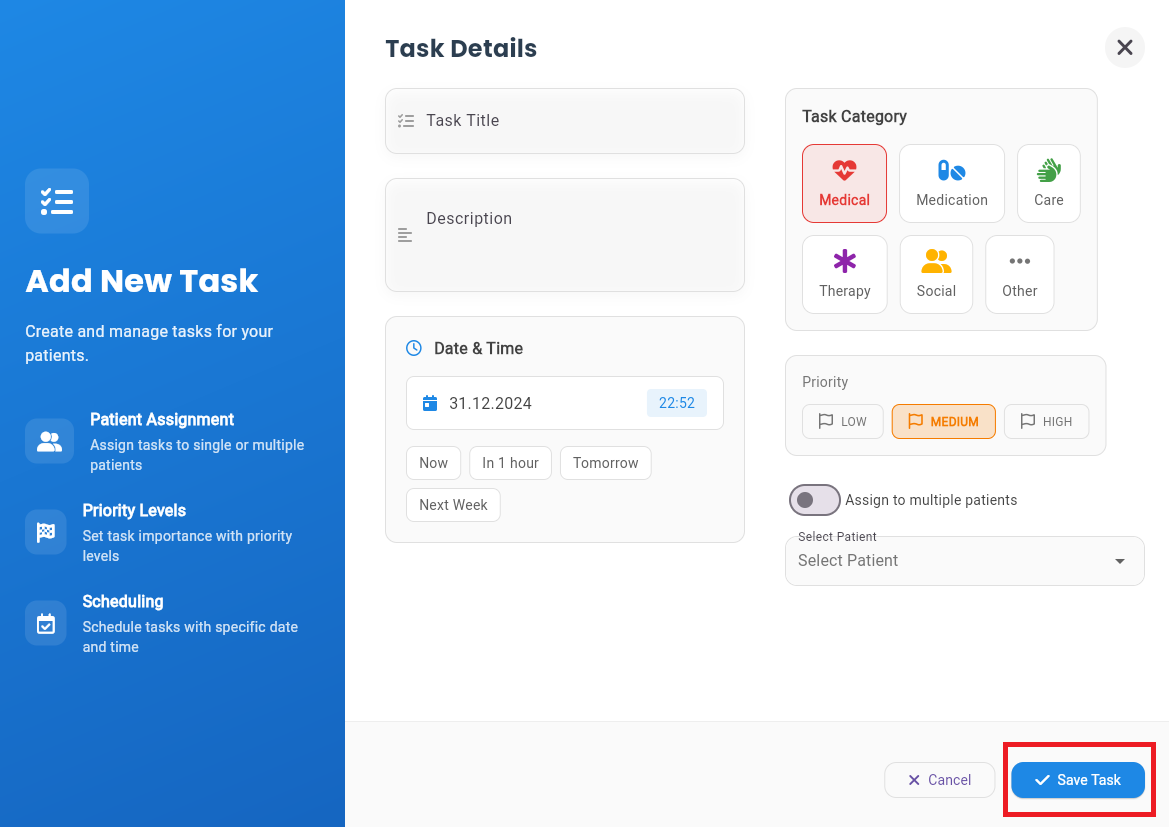
Step 2: Click on the New Task button in the upper-right corner.

Step 3: In the new task form, input details such as task title and description, patient, priority level and assigend nurses.
Step 4: Switch to the Kanban view by clicking the Kanban icon at the top-right corner. Tasks are grouped into columns (e.g., To Do, In Progress, Review, Done). Drag and drop tasks between columns to update their status quickly.
The Activity Planner helps caregivers efficiently schedule, manage, and track patient activities. With this tool, you can organize daily and weekly routines for better engagement and care management.
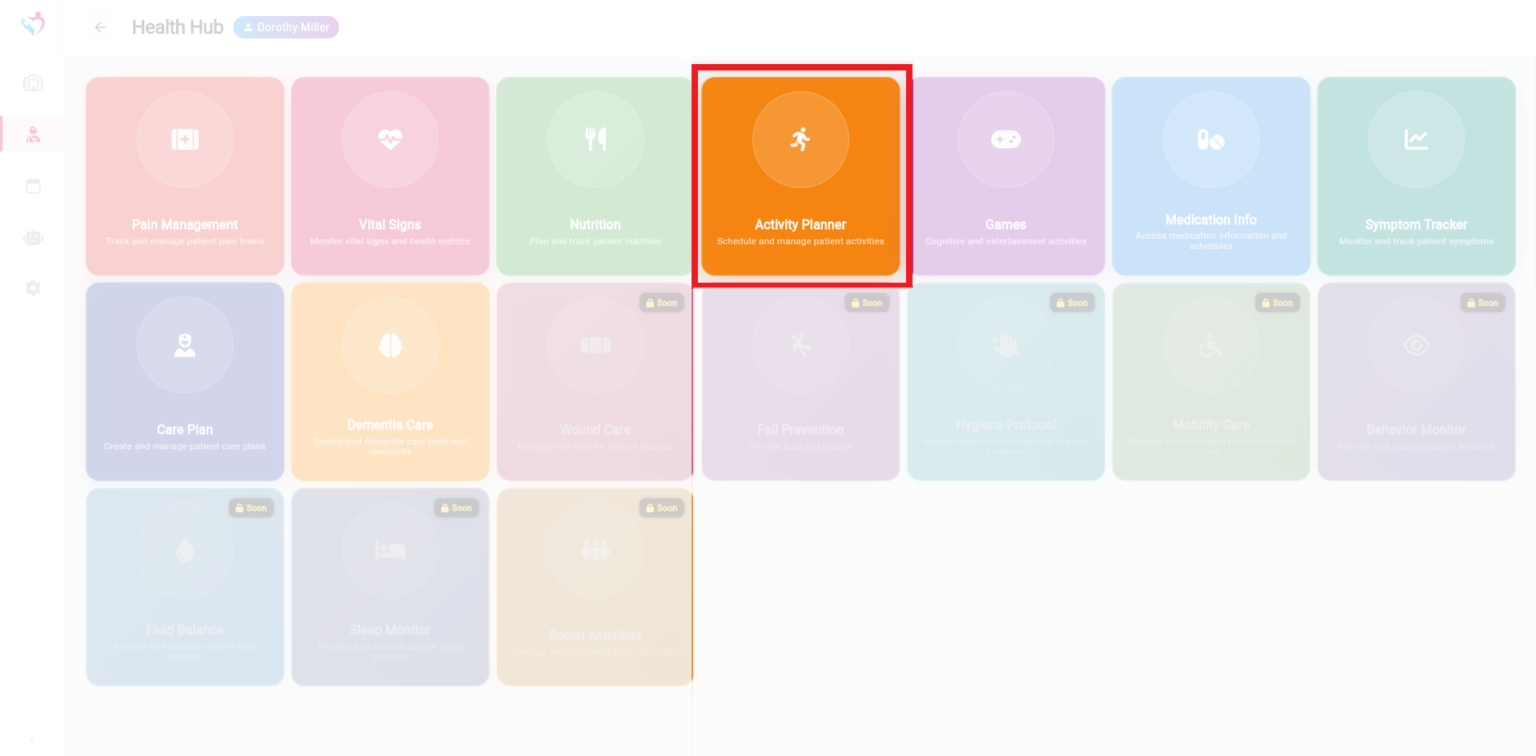
Step 1: Navigate to My Patient and click “Health”. There you will find the Activity Planner. Click on “Activity Planner”
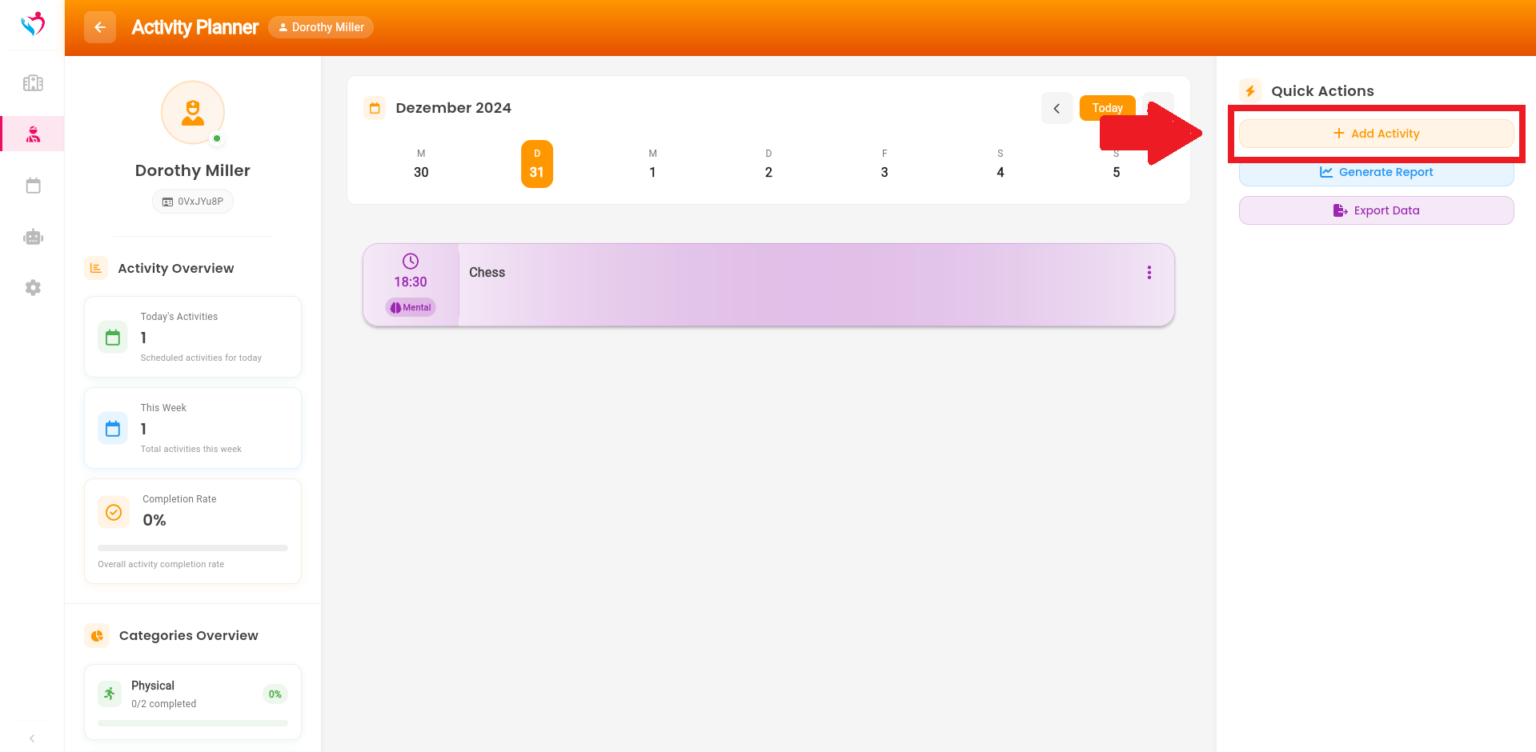
In the menu, you can see in the left column how many activities have already been scheduled for the patient and what types of activities are planned.
Step 2: To create a new activity, first select the desired date in the calendar bar at the top, then click on “Add Activity” in the upper right corner.
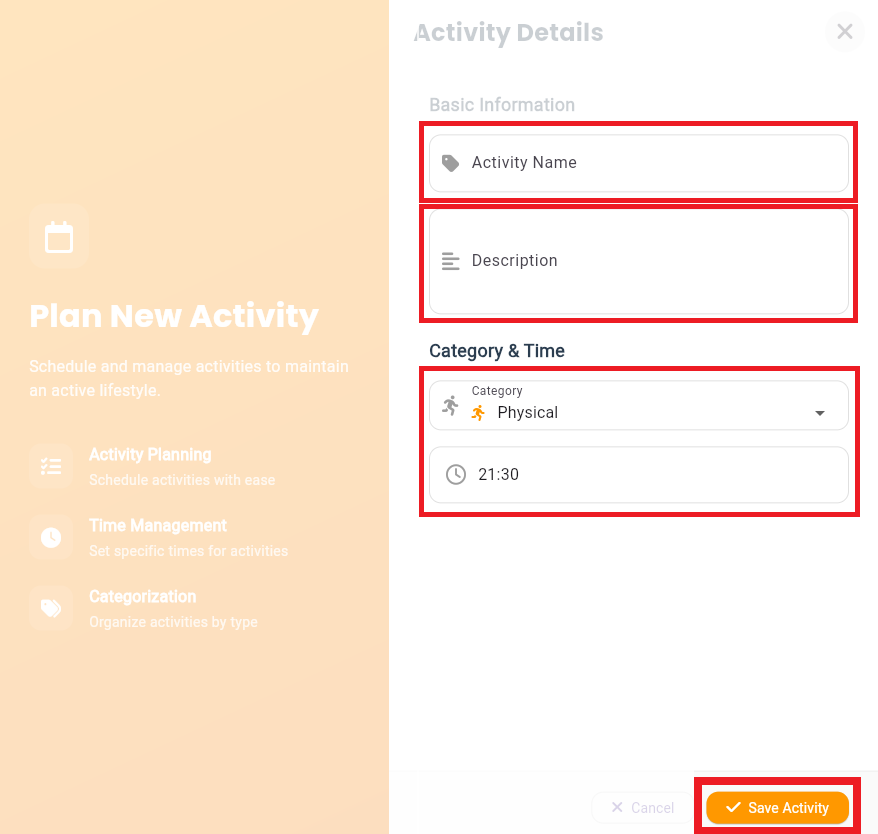
Step 3: Write down the activity name and add a description. Select the category and the time and click “Save Activity”.
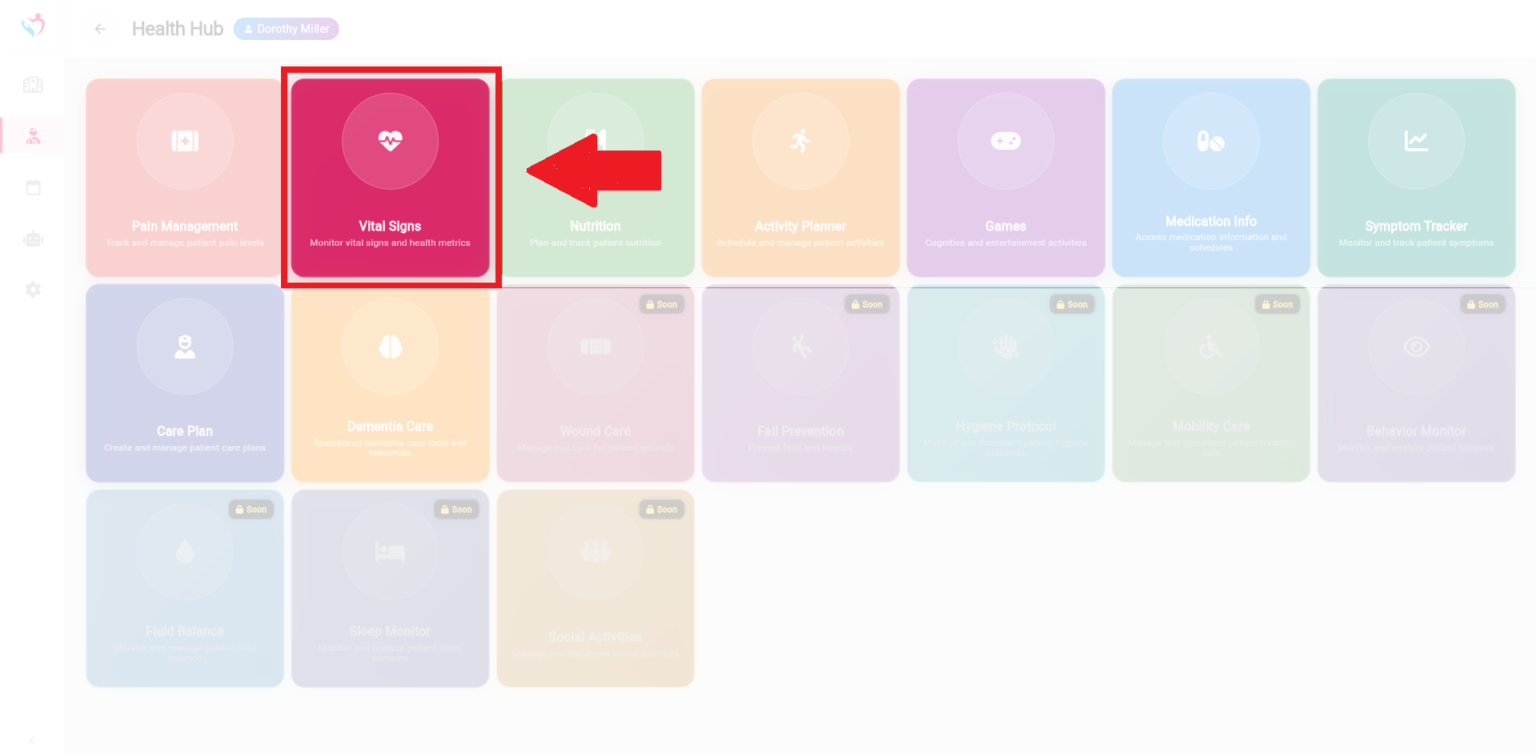
The Vital Signs feature is essential for monitoring key health metrics such as blood pressure, heart rate, and blood sugar levels. It helps caregivers track patient health trends over time, ensuring timely interventions and informed care decisions.
Step 1: Navigate to My Patient and click “Health”. There you will find the Vital Signs. Click on “Vital Signs”.
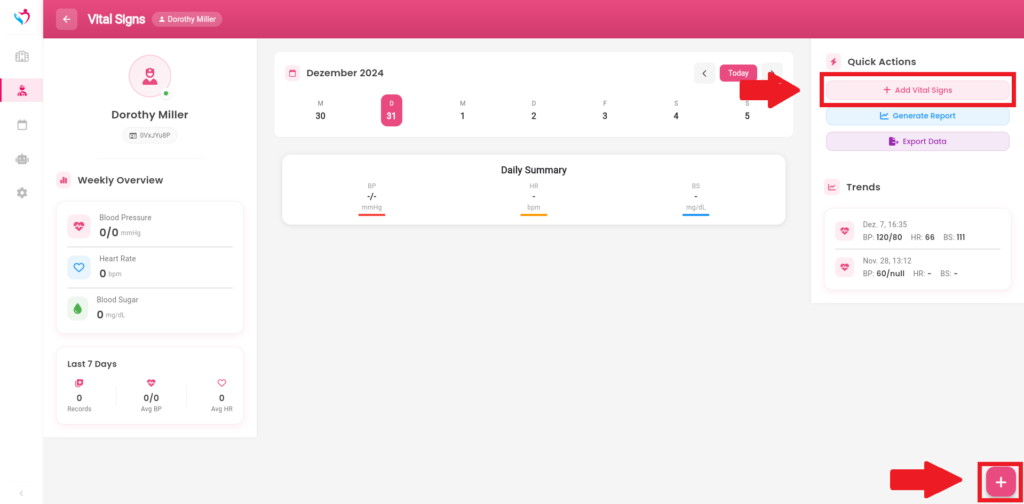
The left panel displays a Weekly Overview of vital metrics, such as Blood Pressure, Heart Rate and Blood Sugar. Below the weekly data, you can review stats for the past 7 days, including average BP and HR. Use the “Trends” panel on the right to see the history of vital signs for the selected patient.
Step 2: To add a new Vital Sign, click on the “+ Add Vital Signs” button located in the Quick Actions menu on the top-right corner.
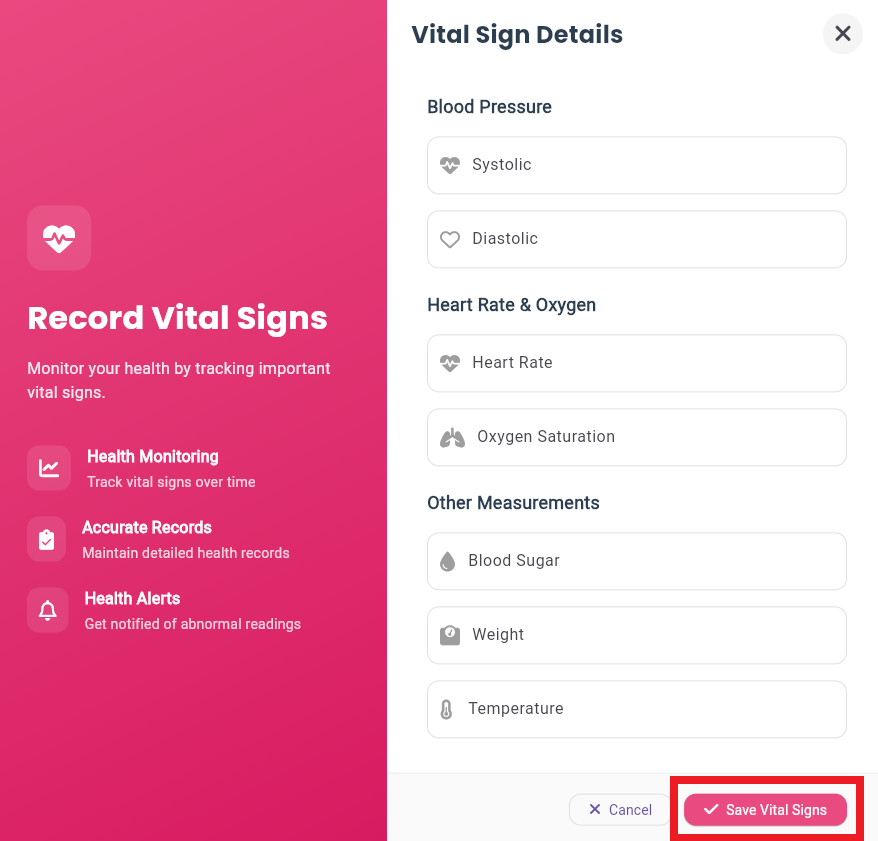
Step 3: A form will appear. Input the measurement date along with the values for blood pressure, heart rate, and any other metrics. Click “Save Vital Signs” to store the data.
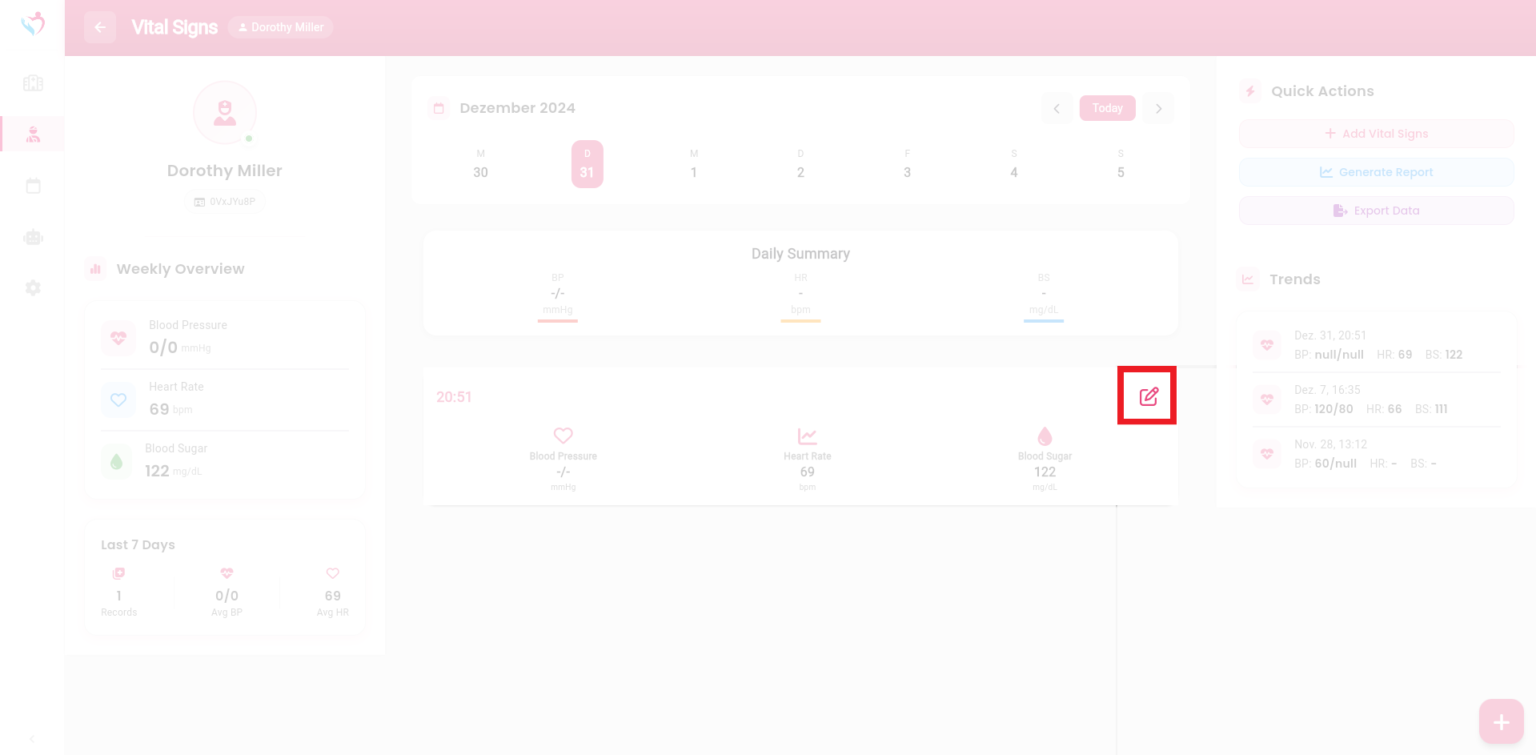
In the menu, the data is displayed in the center. To edit, click the pencil icon located in the upper-right corner.
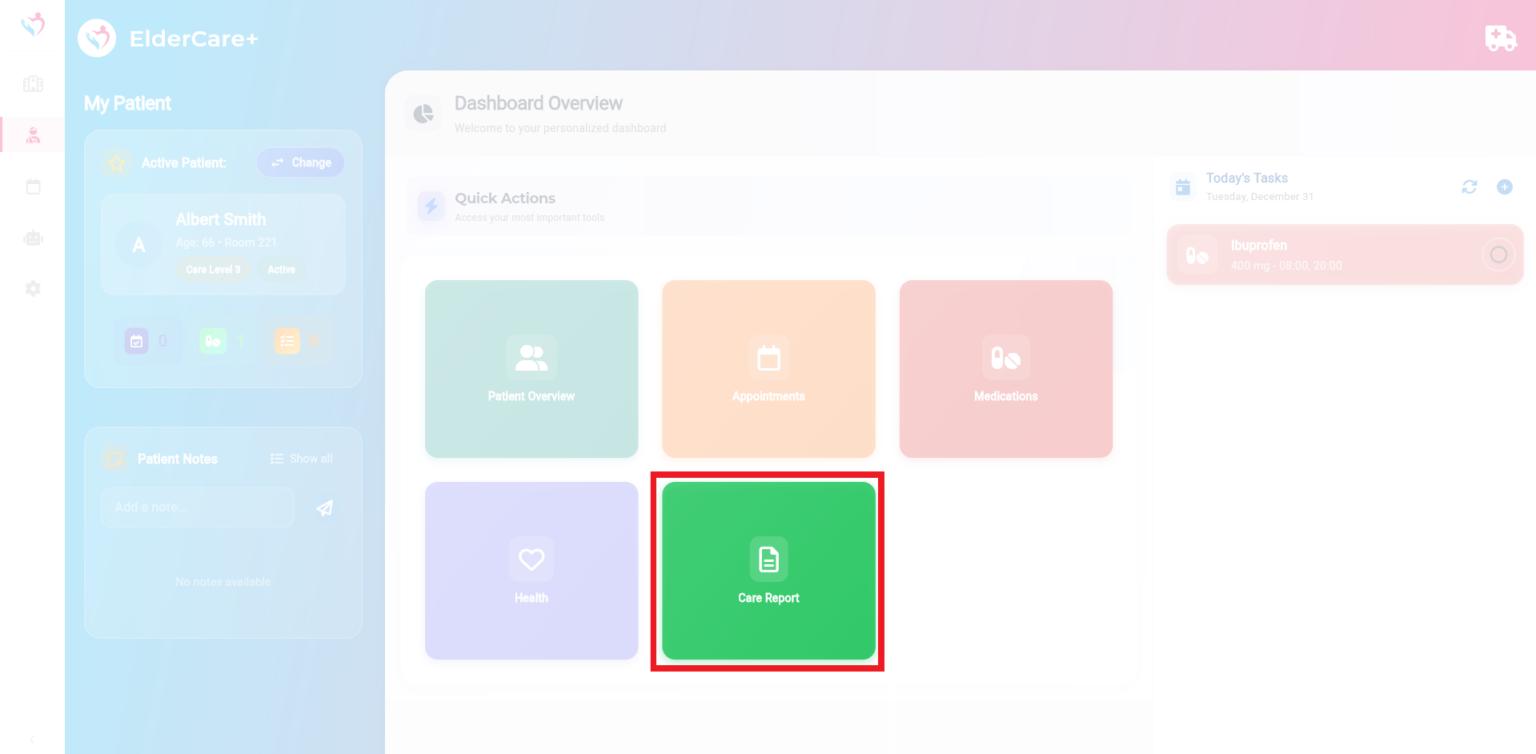
The Care Report module is essential for documenting patient care activities and observations. It allows caregivers to create, edit, and save detailed reports about patient conditions and care provided.
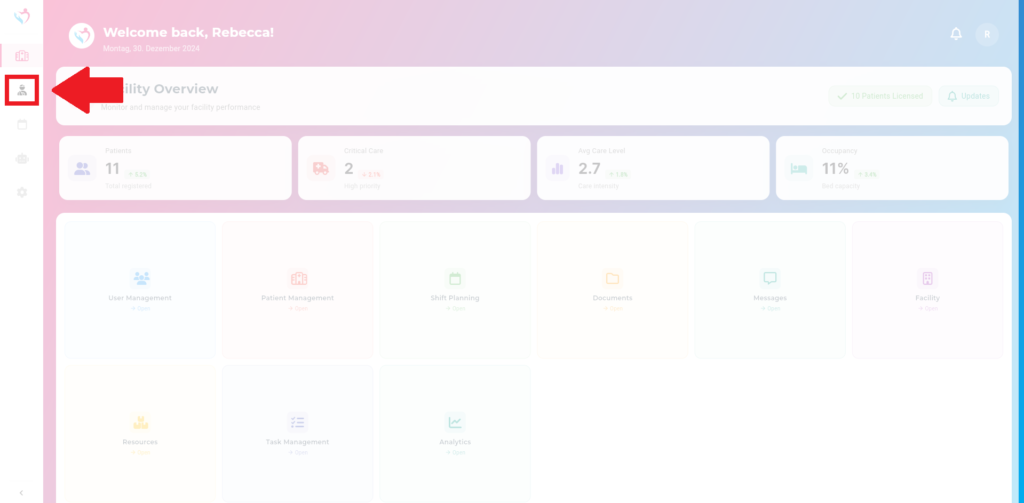
Step 1: Navigate to the My Patient section via the main menu on the left. Click then “Care Report”.
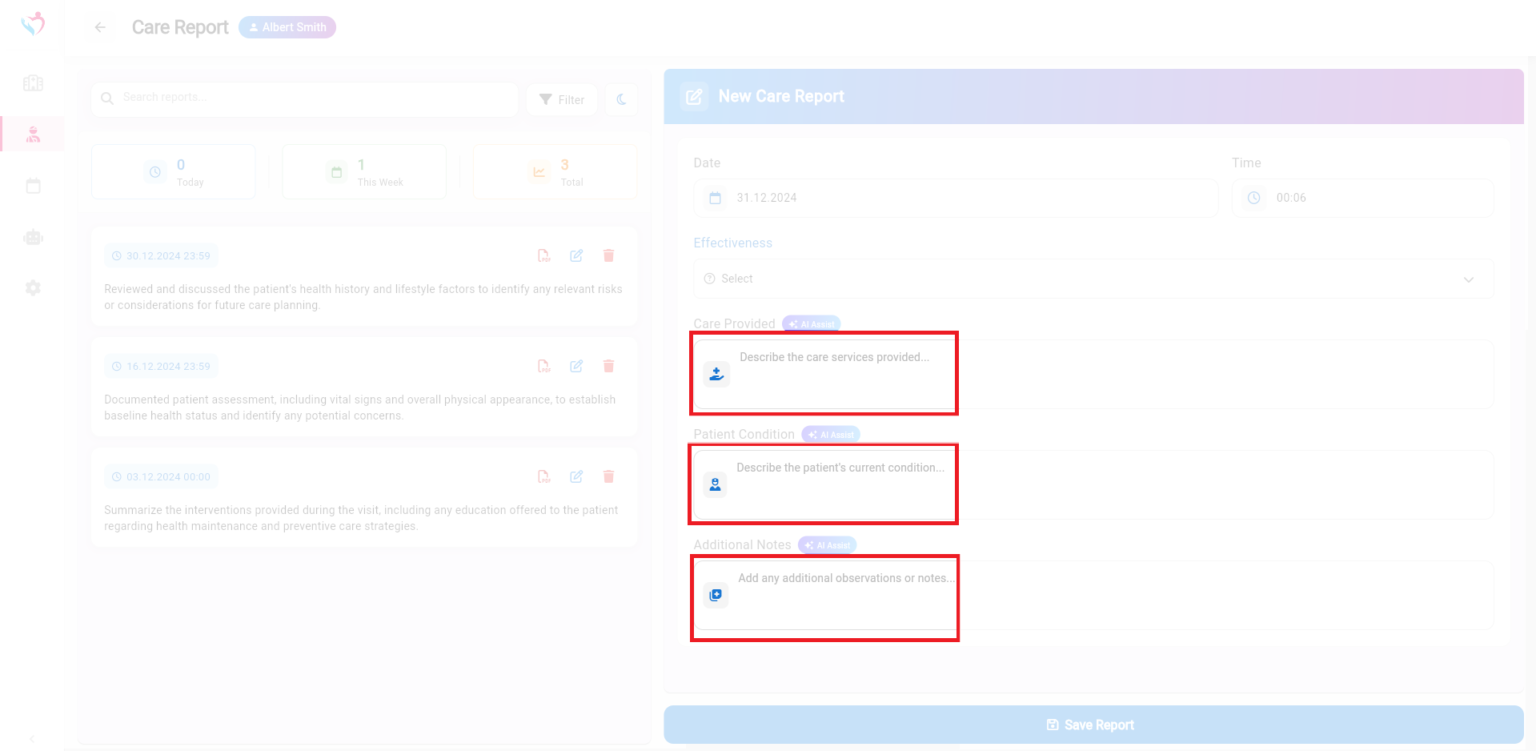
On the left panel, you’ll find a list of care reports. You can filter reports by Today, This Week, or Total.
Step 2: To write a new care report, enter the data into the form on the right. Bullet points are sufficient.
Step 3: Attention! Before saving the report, click on AI Assistant. It will help you turn your bullet points into a complete report.
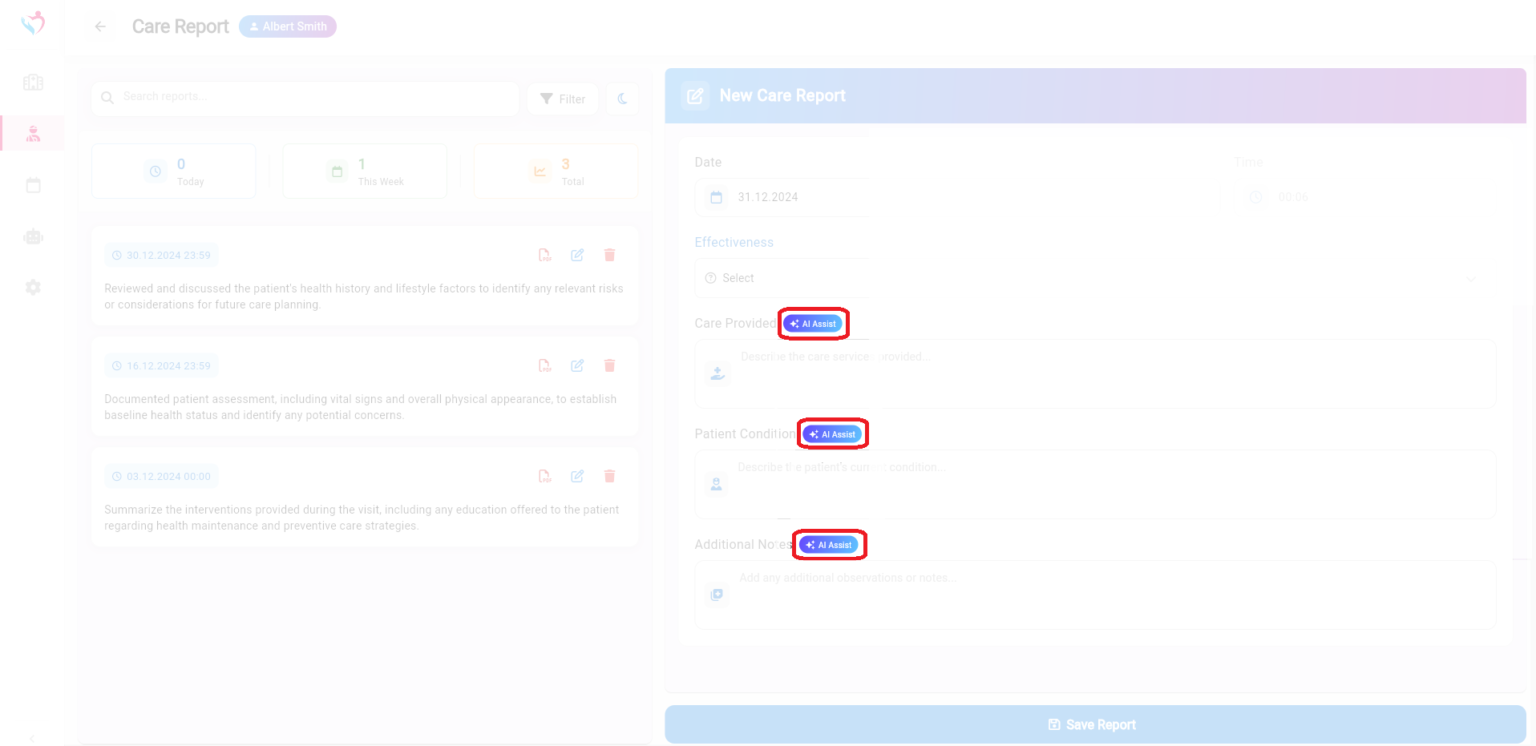
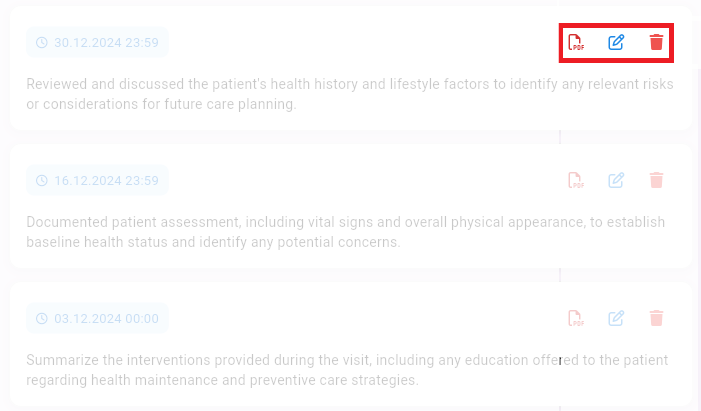
Step 4: To edit a report, click the pencil icon next to the respective entry. To delete a report, use the trash bin icon.
The Medications feature is designed to help healthcare providers manage patient medications effectively. Track active prescriptions, dosages, schedules, and monitor adherence rates with ease.
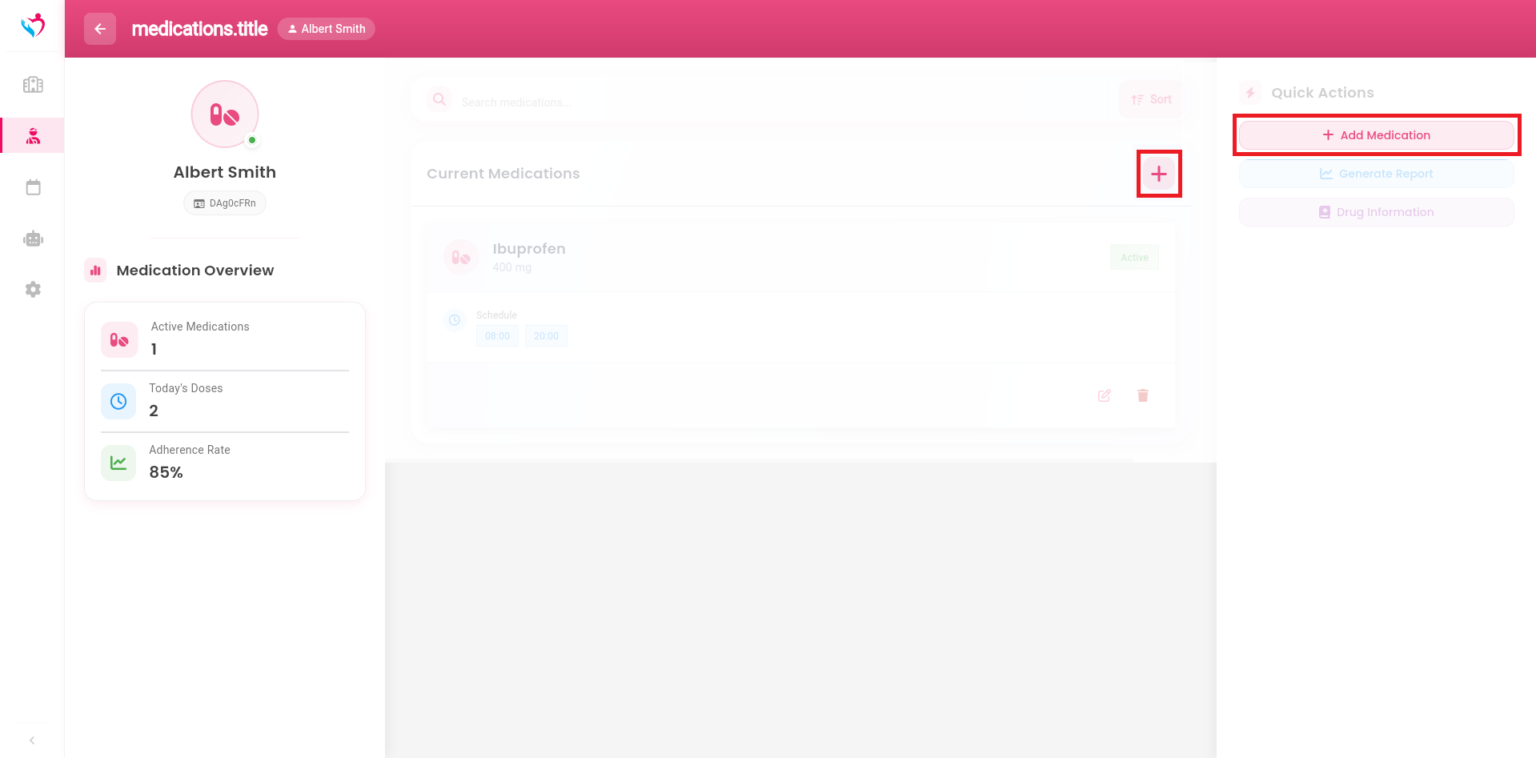
Step 1: Navigate to the My Patient section via the main menu on the left. Click then “Medications”.

After opening, the current medications with details like dosage, schedule, and instructions are displayed in the centre.
Step 2: To add a new medication, click the “New Medication” button in the top-right corner.
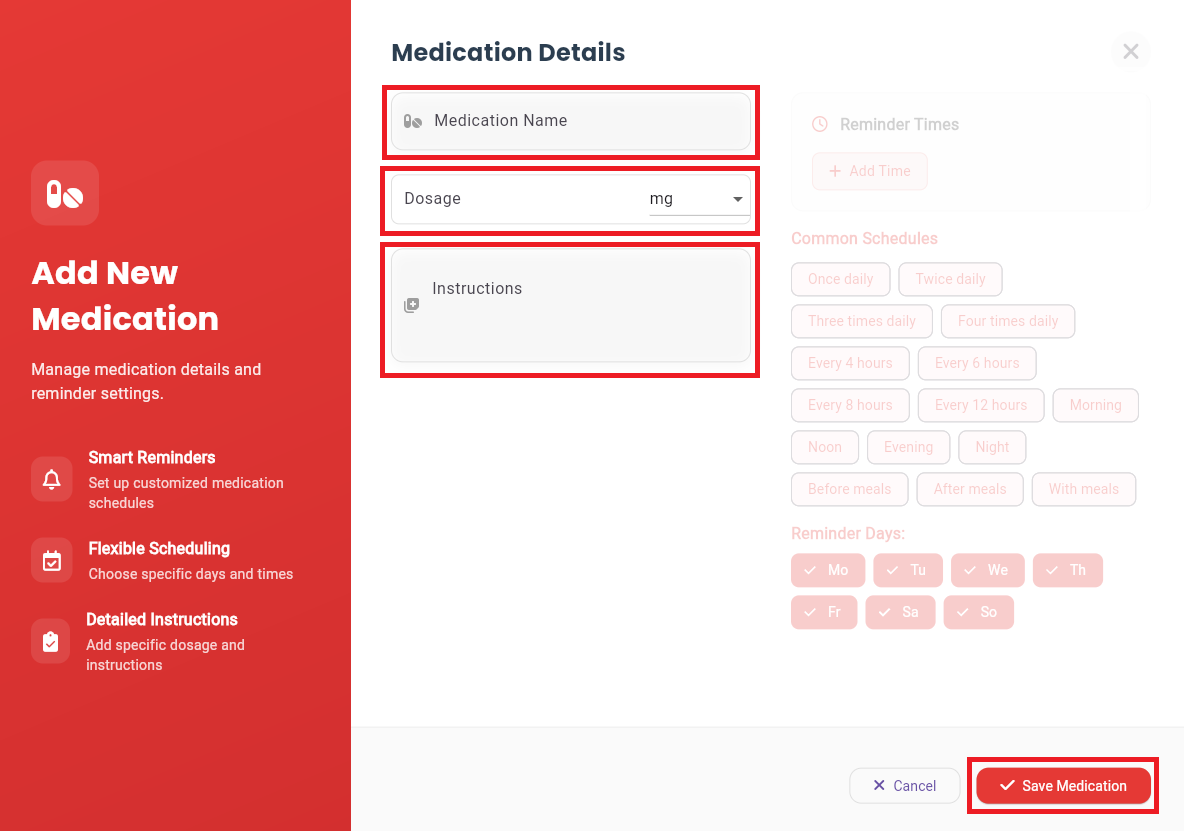
Step 3: A form will appear. Fill out the form with details like medication namen, dossage and instructions. Click Safe Medication to finalize.
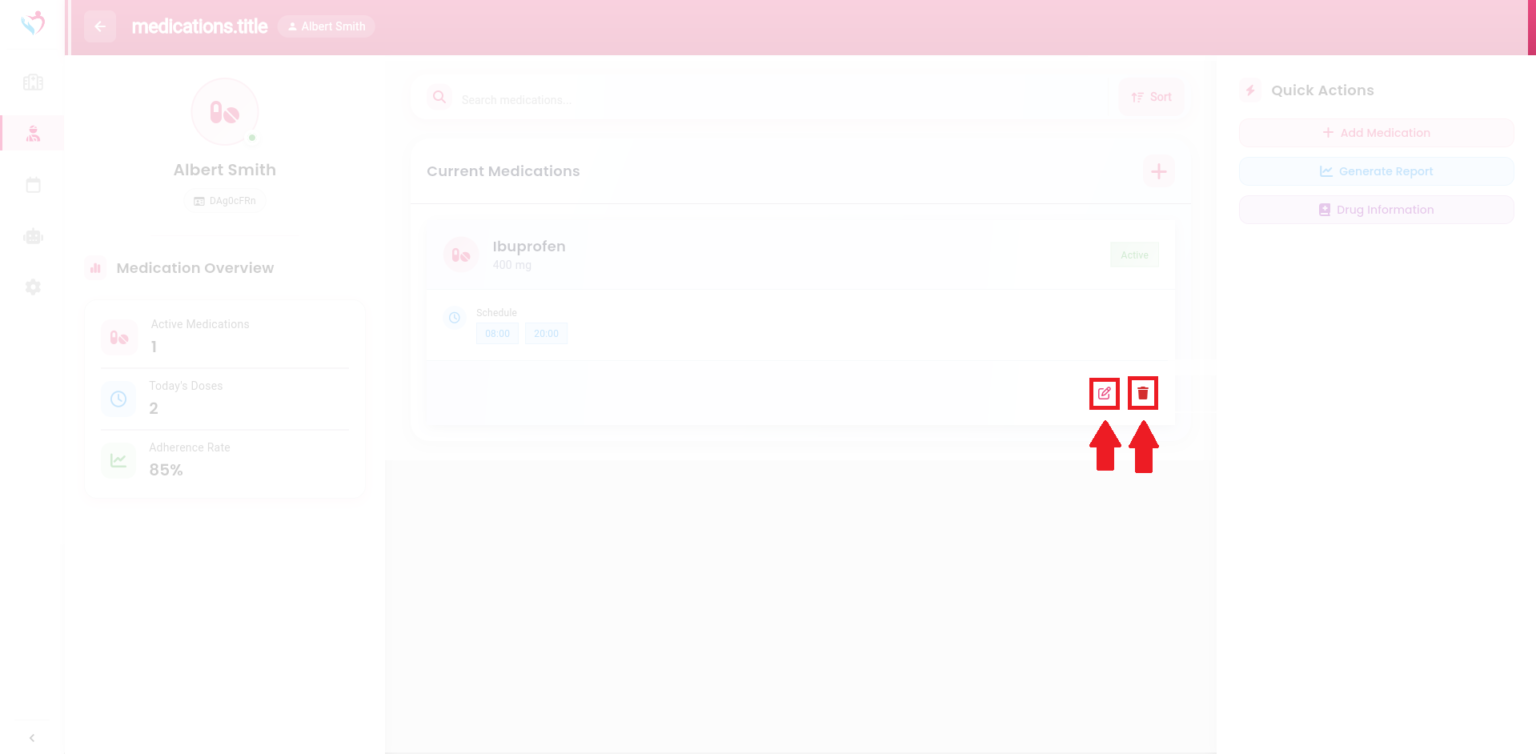
Step 4: Use the edit (pencil) icon next to the medication to modify its details or use the delete (trash) icon to remove a medication from the list.
Subscribe to our newsletter today to receive latest news and get 10% off for your first month.