The Patient Management feature allows you to efficiently organize and manage all patient-related information within your care facility. You can add new patients, edit their details, and assign care levels. This feature can only be used by administrators.
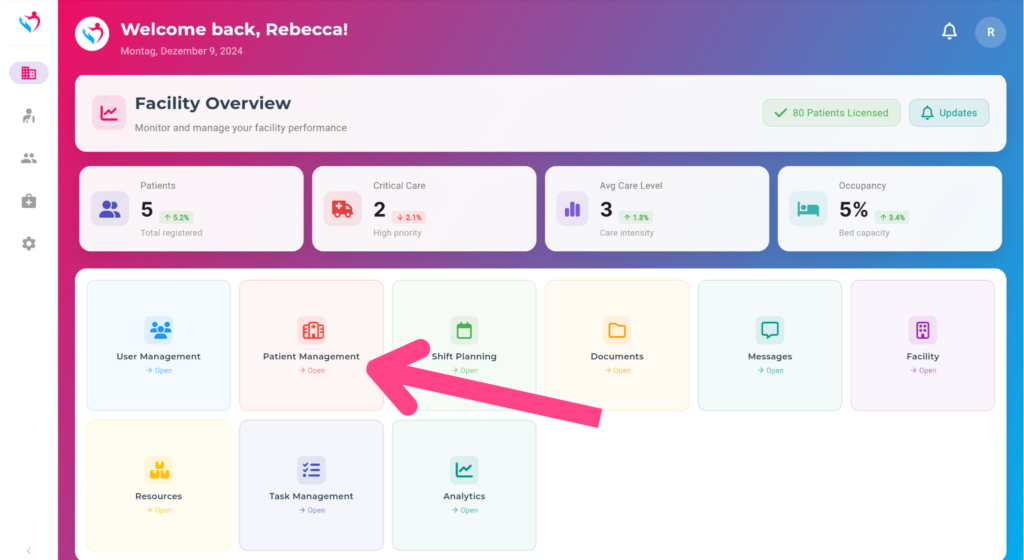
Step 1: Navigate to the Patient Management section from the main dashboard by clicking on Patient Management.

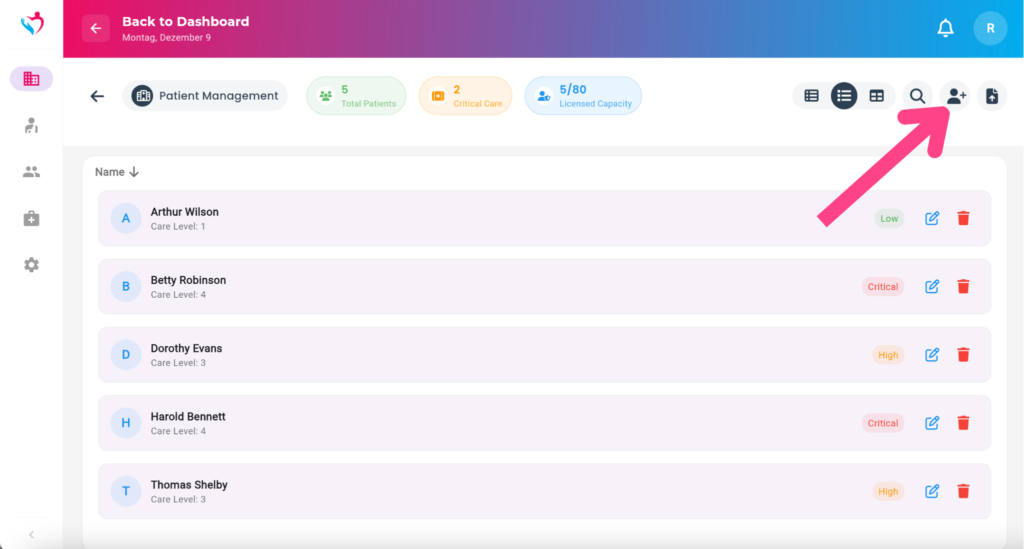
In the left panel, view the total number of patients, the number of patients requiring critical care, and your facility’s licensed capacity. The patient list displays names and care levels, categorized as Low, Medium, High, or Critical. Use the icons in the upper right corner to switch between different list views for better accessibility.
Step 2: Click on the “+” (Add Patient) button in the upper right corner to create a new patient profile.

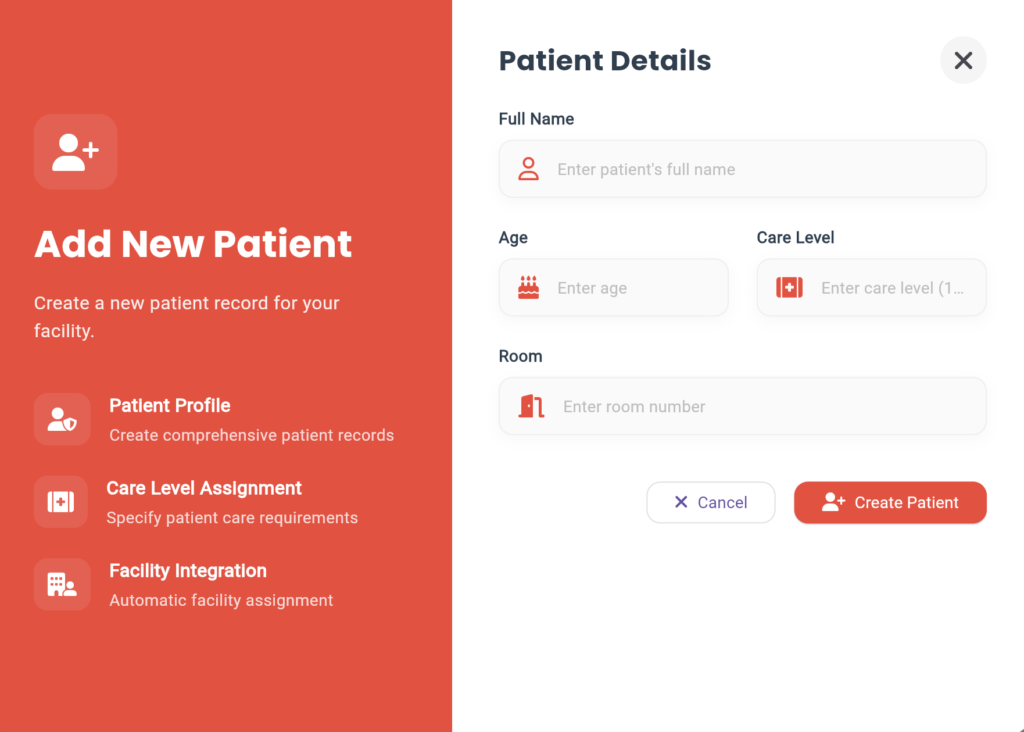
Step 3: Enter the patient’s information. Provide the name, age, care level, and room number, then click on Create Patient.

When patients created, click the pencil icon next to a patient’s name to edit their information. Update personal details, adjust care levels, or add relevant medical notes.

